I have personally deployed several different hyper converged solutions in the past, I am excited to finally get my hands on a NetApp HCI Cluster.
The luxury of having hardware available in our lab gives me the opportunity to create / simulate several deployment scenarios, customer proof of concepts, perform firmware updates and give training.
There are several reasons why you would perform a RTFI, like repurposing nodes, version mismatch on a new install or like in my instance, refreshing back to factory for a demo.
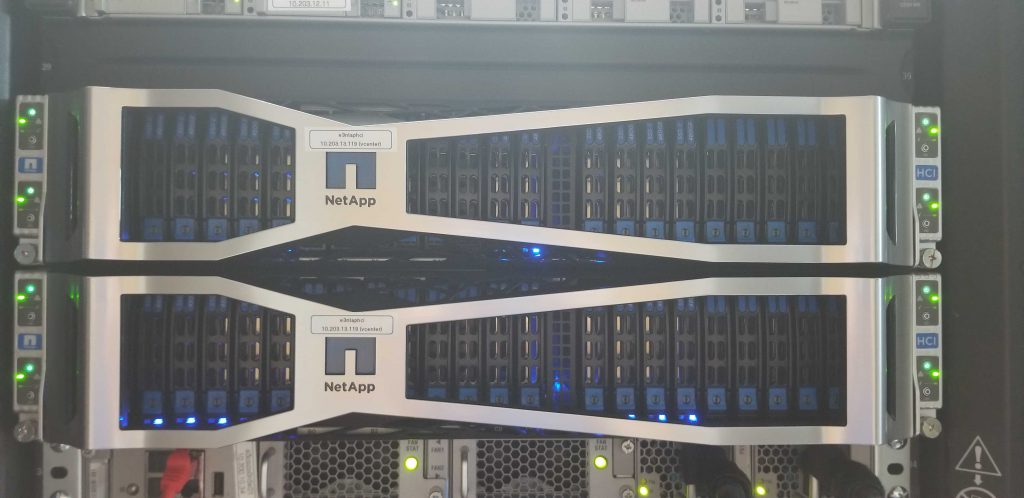
This NetApp HCI Cluster is configured with IPMI (static IP) and USB Keys that have been connected to each node for a quick factory re-image (RTFI) to DEMO NetApp NDE.
I am fortunate to have access to a NetApp HCI 4X4 (Compute & Storage) Cluster for this RTFI.
* PROCEED WITH CAUTION
This of course wipes out everything on the existing cluster, make sure to validate that there are no important VMs deployed and no one is using the environment before proceeding.
It is also a good idea to have an updated copy of the configuration spreadsheet for IPs, cabling, and switch configuration open on another monitor for easy reference.
Return to Factory Image (RTFI) – Compute & Storage Nodes
The following steps outline the procedures of RTFI your existing HCI cluster. If you are proficient and have multiple display monitors, you could have multiple bowsers open to help speed up the process.
Configure Compute Nodes
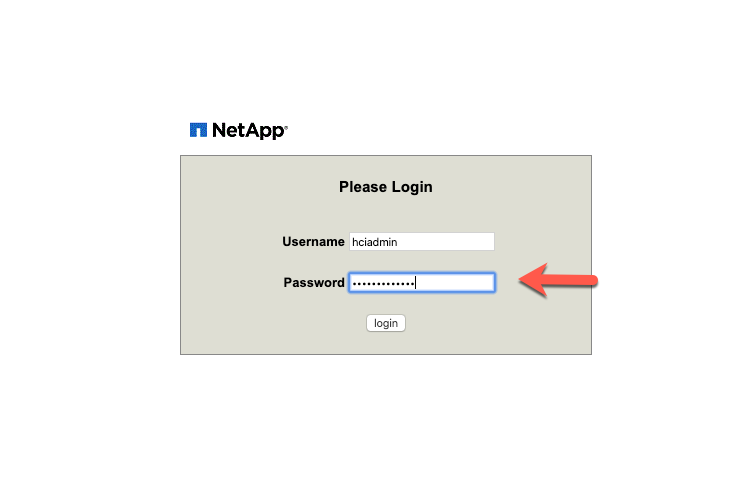
Connect to each IPMI Compute Node previously configured.
- use credentials saved from the configuration spreadsheet
Power down each of the Compute nodes physically or via the IPMI.
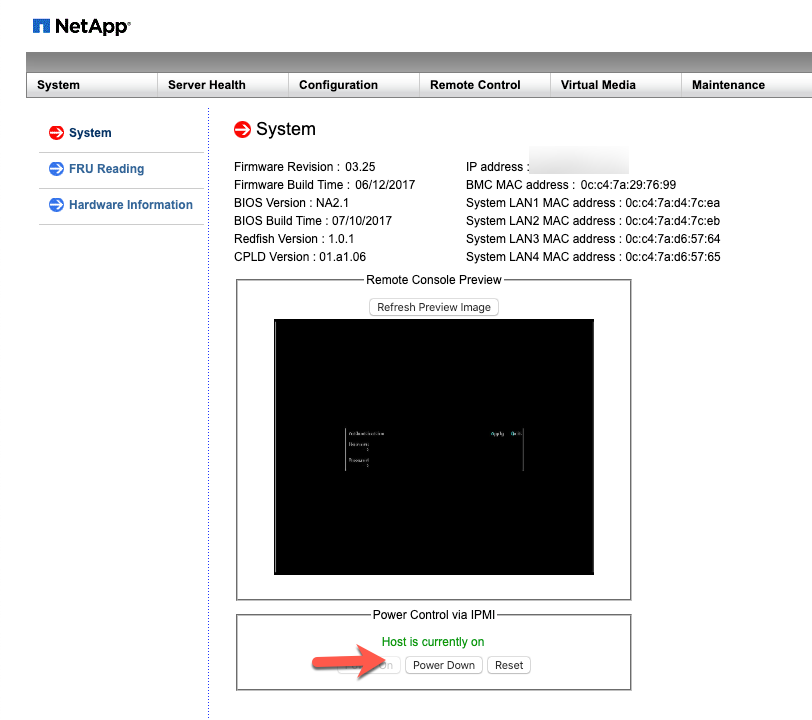
Power on nodes physically or via the IPMI one at a time.
- During this RTFI, I will focus with the Compute Nodes before moving on the Storage Nodes.
- I will also work with one node at a time, once you become proficient, you can work with multiple connections.

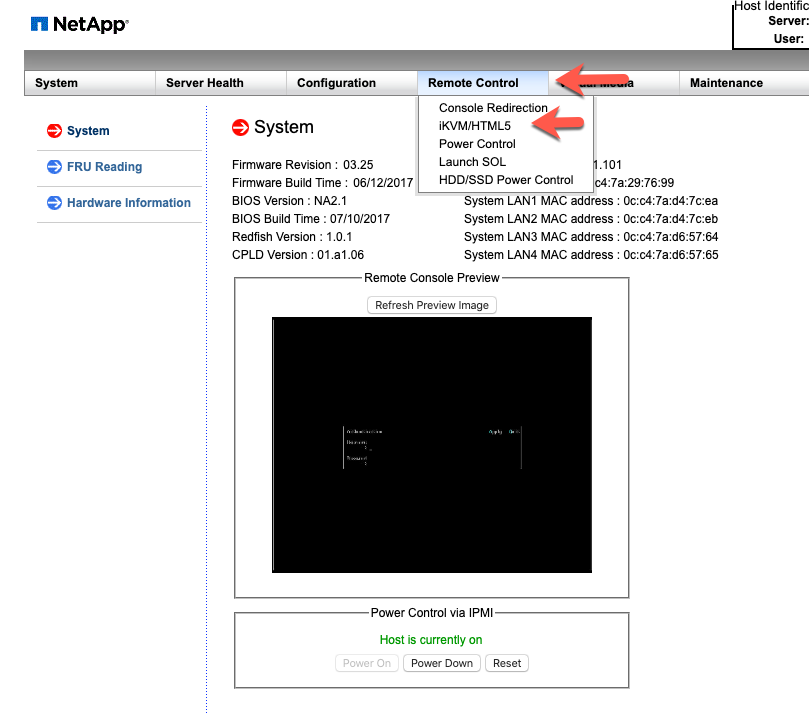
Connect to the HTML5 KVM Console of each Compute Node
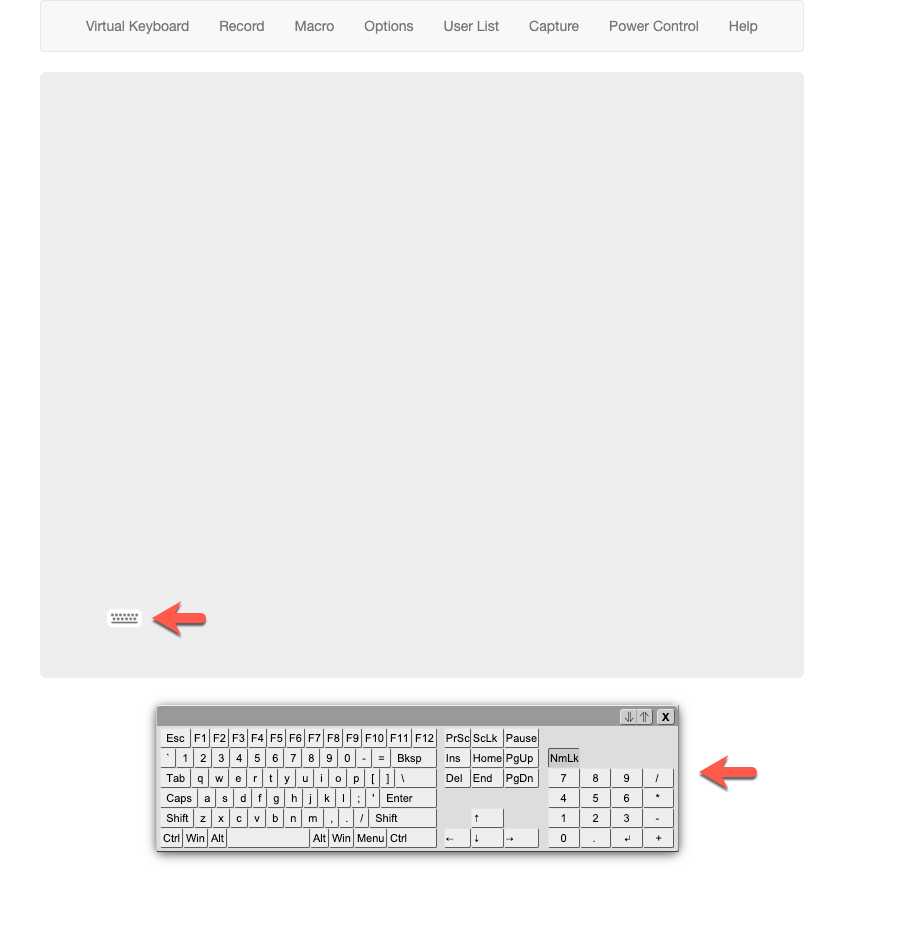
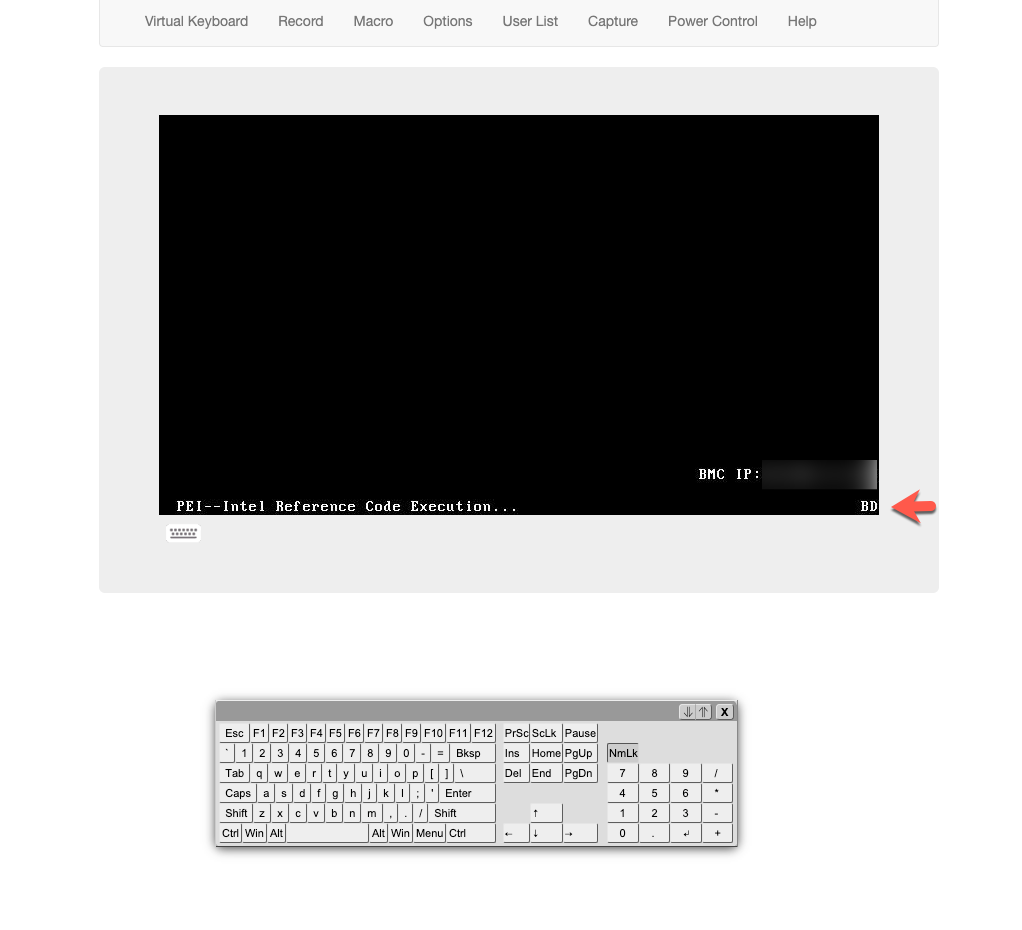
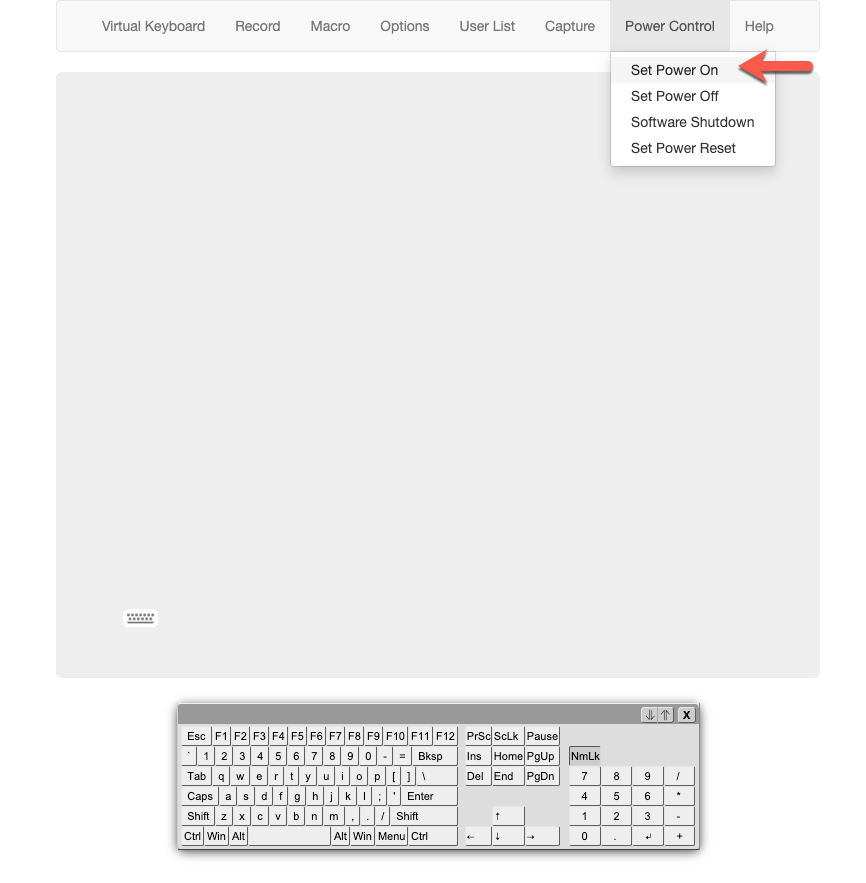
Launch the virtual keyboard to help ensure you can catch the F11 key. Upon appearance of the NetApp splash screen, hit F11 repeatedly for the ‘Boot Menu’.
- Note: The splash screen appears after hex number 91 appears in the lower right corner. Once you see the hex number 91, start pressing the F11 repeatedly.
- Tip: If the IPMI console becomes unresponsive, select ‘Unit Reset’ from the Maintenance menu on the IPMI homepage.
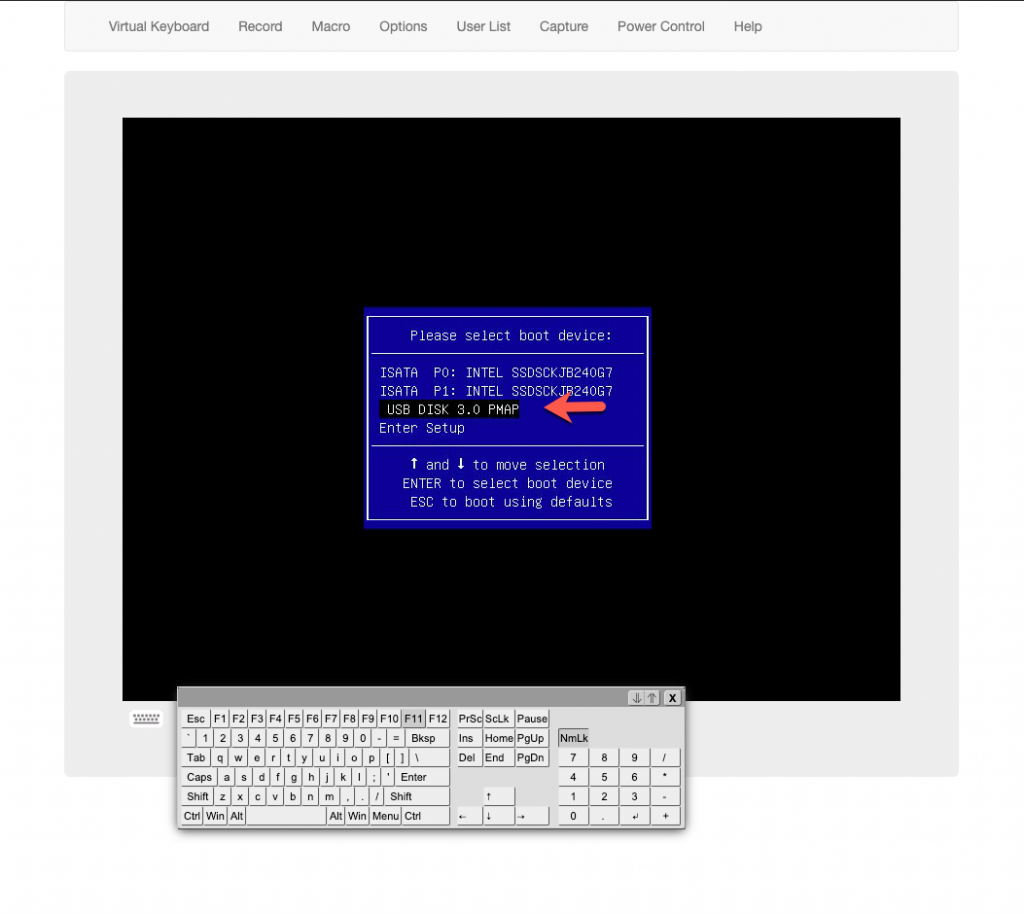
Select the ‘USB Disk…’ boot device.
- the USB drive is bootable with version 1.6
- having this older version allows me to demonstrate updates after deployment.
Hit Enter at the ‘Boot:’ prompt.

Answer the following onscreen questions.
‘YES’ to proceed

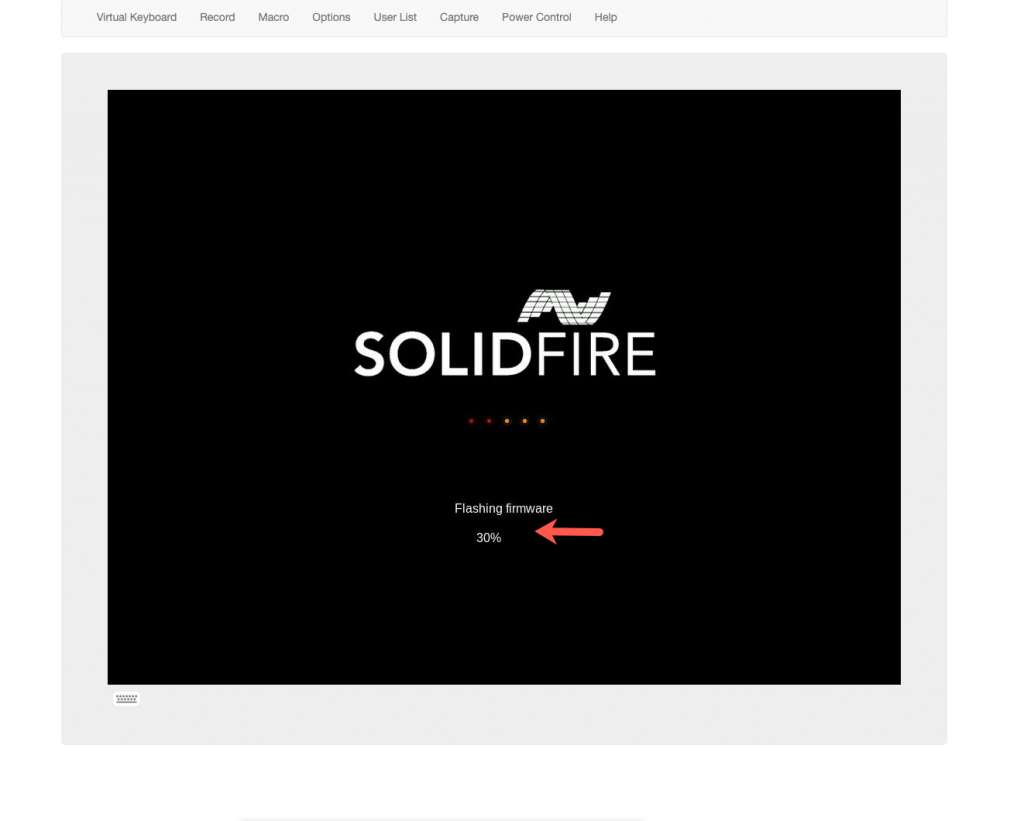
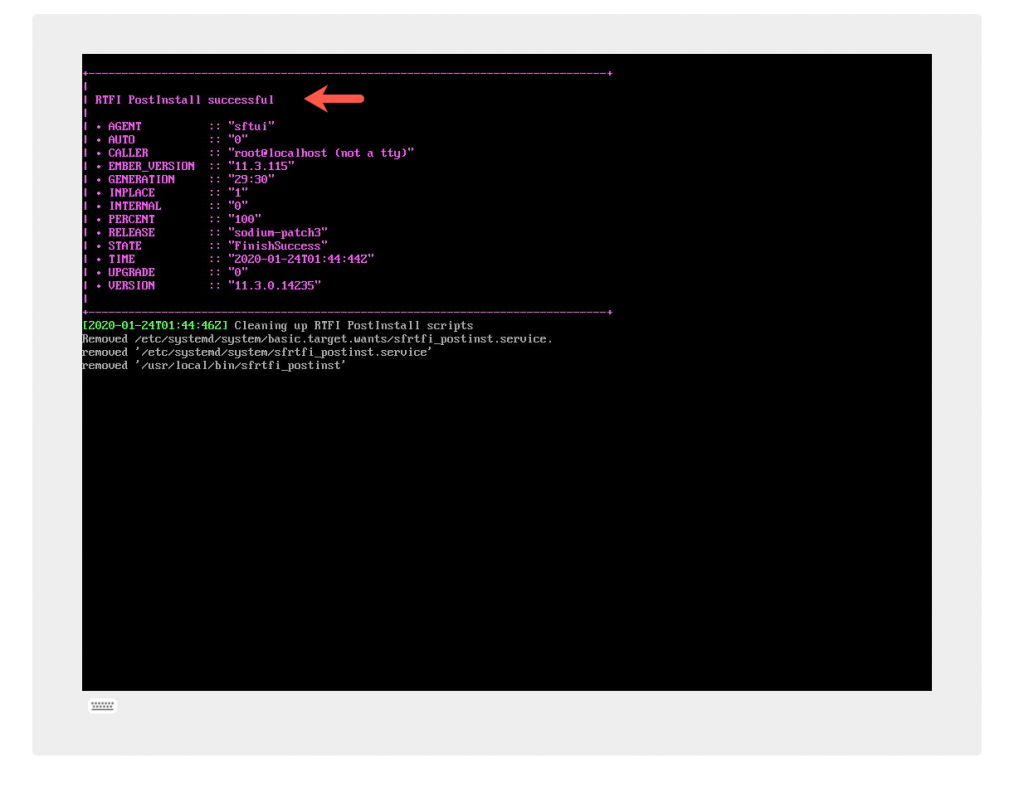
This will start the RTFI process of the Compute Nodes and they will power off after successful imaging.
After the imaging process is complete you will need to Power on the Compute Nodes. Power on your Compute Nodes one at a time, as you need to monitor the output closely.
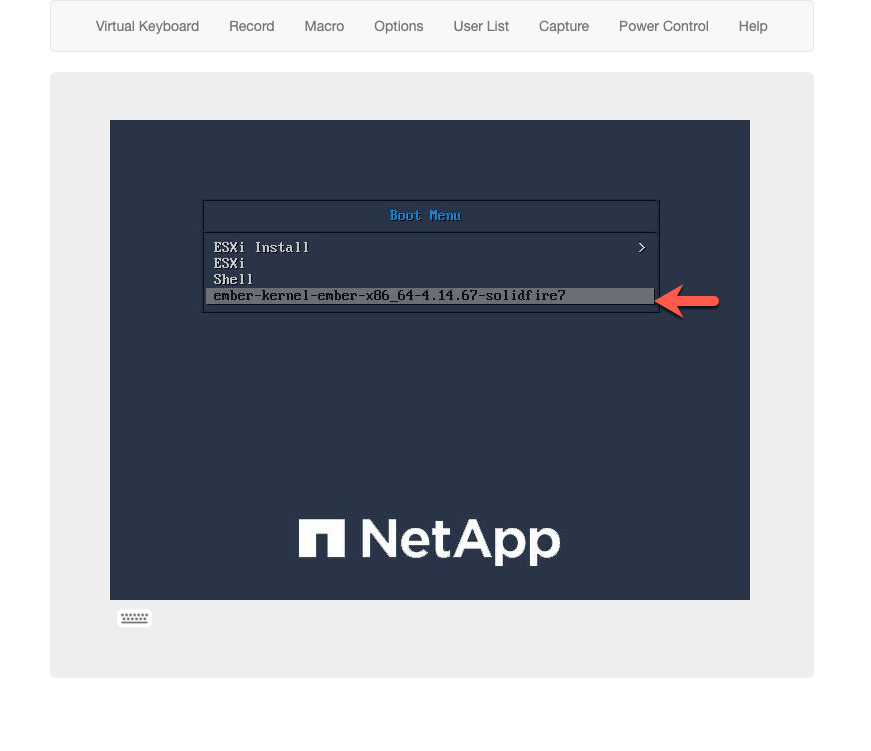
When the grey boot menu appears, use the arrow keys to scroll down through the list of entries to select the boot option that starts with ember-kernel-ember….
- Note: The desired package may not be visible in the box or the selection list initially. You may need to scroll through the entire list to find the ’ember…’ entry.
- Also note: You only have 5 or 6 seconds to make your selection so monitor the console output closely.
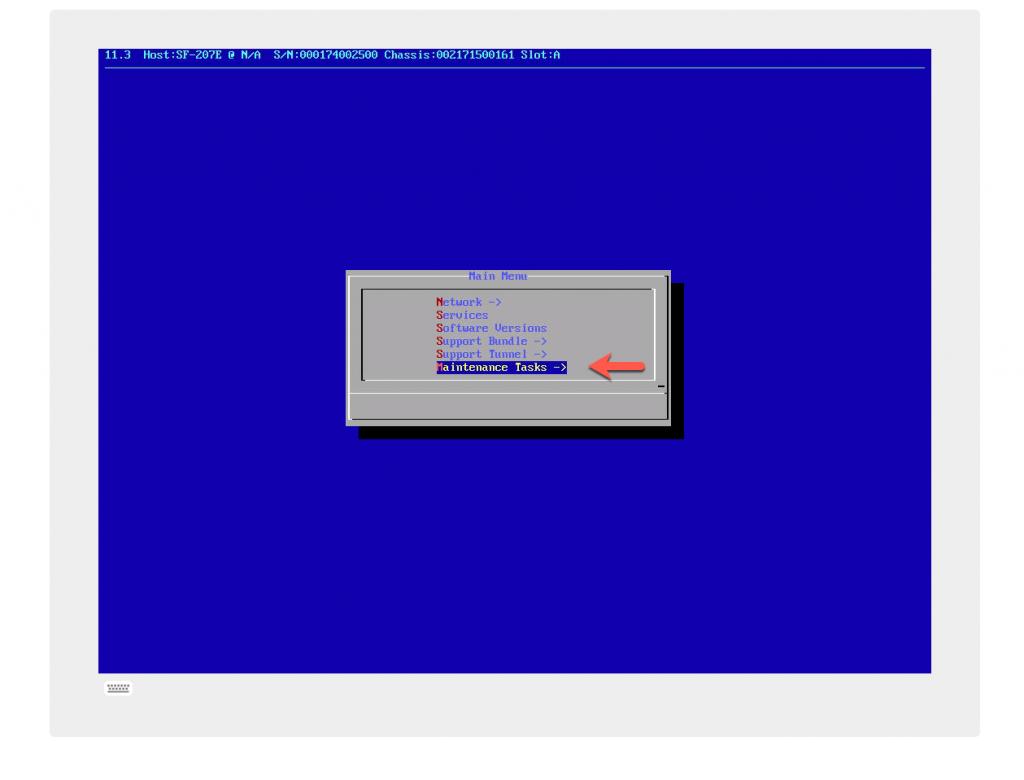
When the blue ANSI menu appears, select Maintenance Tasks Node.
Select Factory Reset
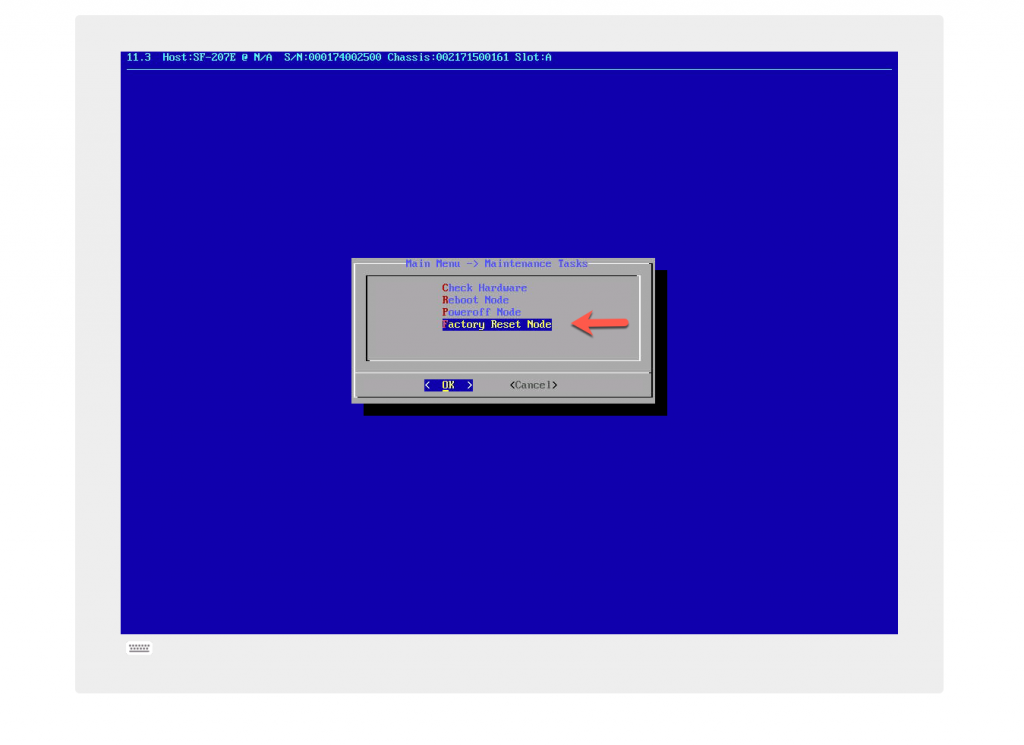
Select Yes
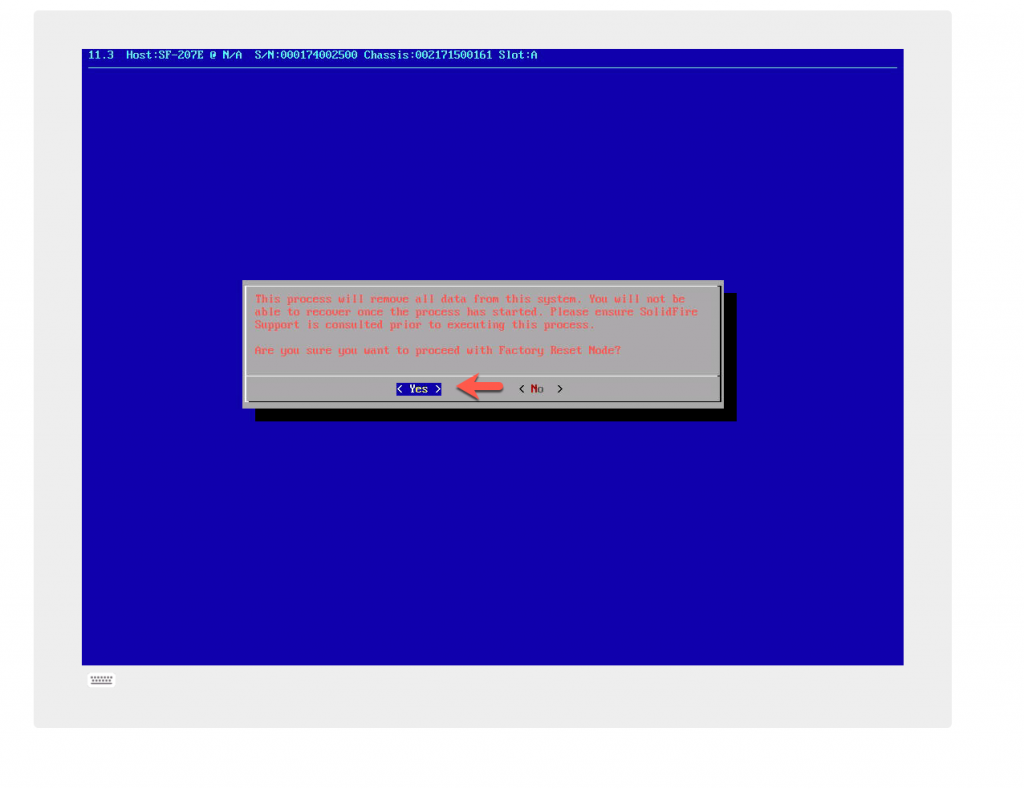
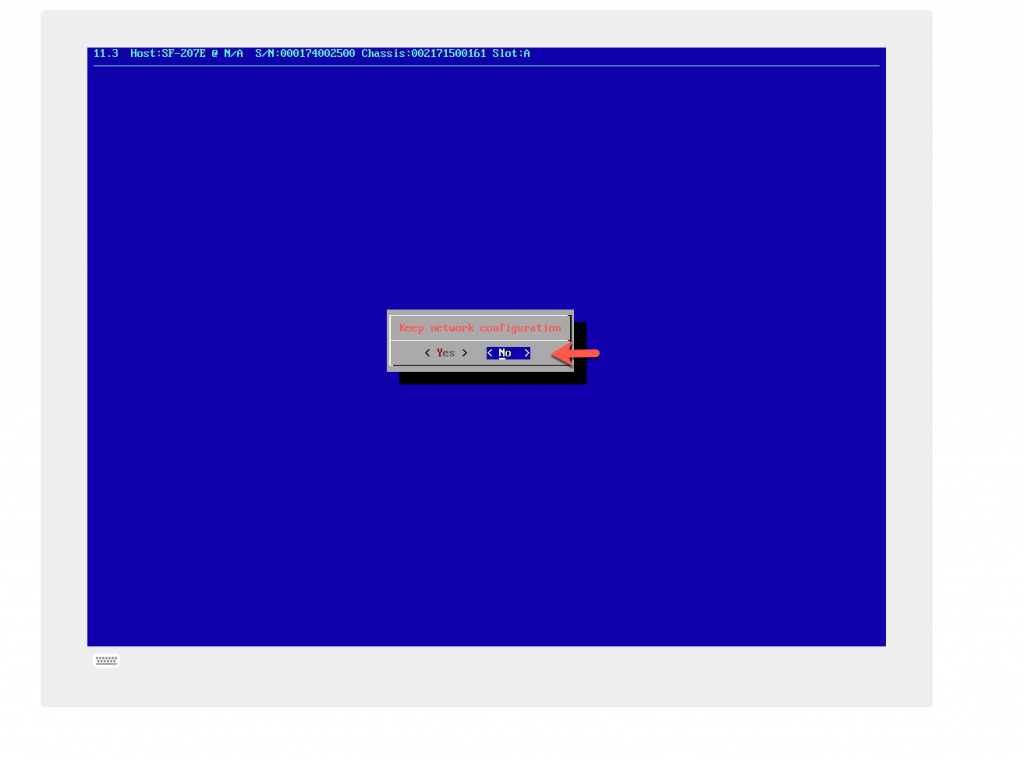
Do not save the networking information, as we want to wipe the old Network configuration from the Compute Nodes.
This will start the imaging process, once initiated you can close the IPMI and move to the next Compute Node.
Repeat steps for each remaining compute node.
Configure Storage Nodes
Connect to each IPMI Compute Node previously configured.
- use credentials from configuration spreadsheet
Power down each of the Compute nodes physically or via the IPMI.
Power on nodes physically or via the IPMI one at a time.
- During this RTFI, I will focus with the Compute Nodes before moving on the Storage Nodes.
- I will also work with one node at a time, once you become proficient, you can work with multiple connections.
Connect to the HTML5 KVM Console of each Storage Node
Launch the virtual keyboard. Upon appearance of the NetApp splash screen, hit F11 repeatedly for the ‘Boot Menu’.
- Note: The splash screen appears after hex number 91 appears in the lower right corner.
- Tip: If the IPMI console becomes unresponsive, select ‘Unit Reset’ from the Maintenance menu on the IPMI homepage.
Select the ‘USB Disk…’ boot device.
Hit Enter at the ‘Boot:’ prompt.
Answer the following onscreen questions.
- Storage Nodes
- ‘Yes’ to ‘Proceed’.
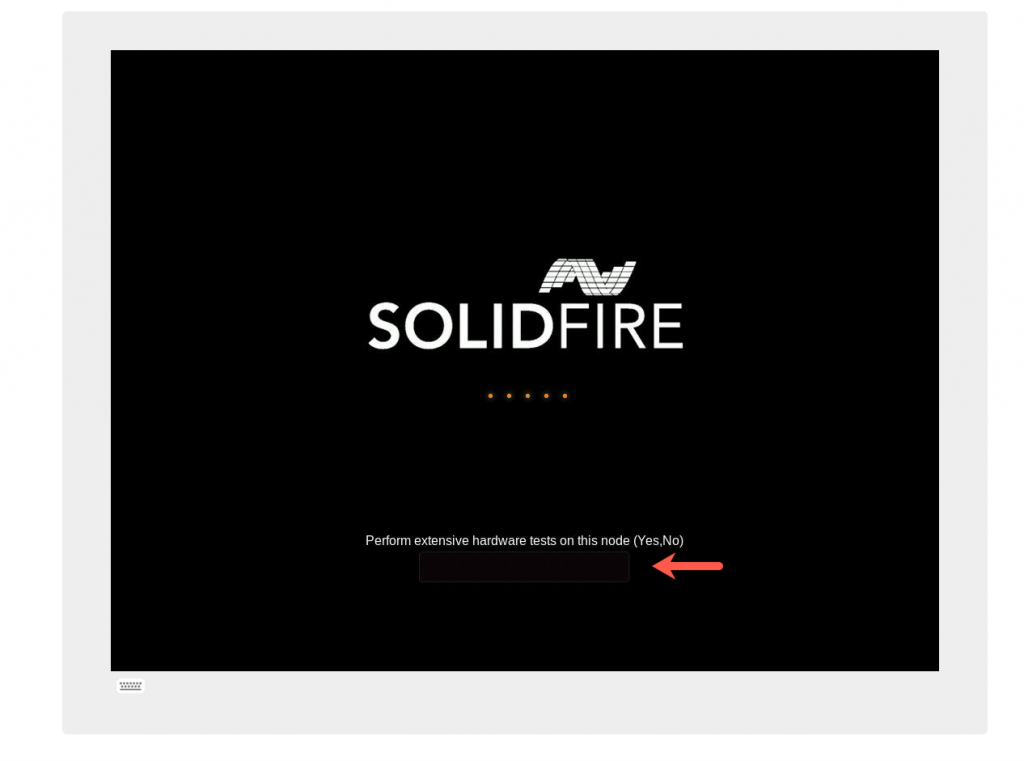
- ‘No’ to ‘Extensive Hardware Tests’.
- ‘Yes’ to ‘Proceed and Destroy Existing Cluster’ (if a valid cluster already exists).

Nodes will power off after successful imaging.
Power on each of the storage nodes physically or via the IPMI. Allow the nodes to boot to the Ember operating system without interruption.
Connect to the KVM console of ONE storage node via IPMI
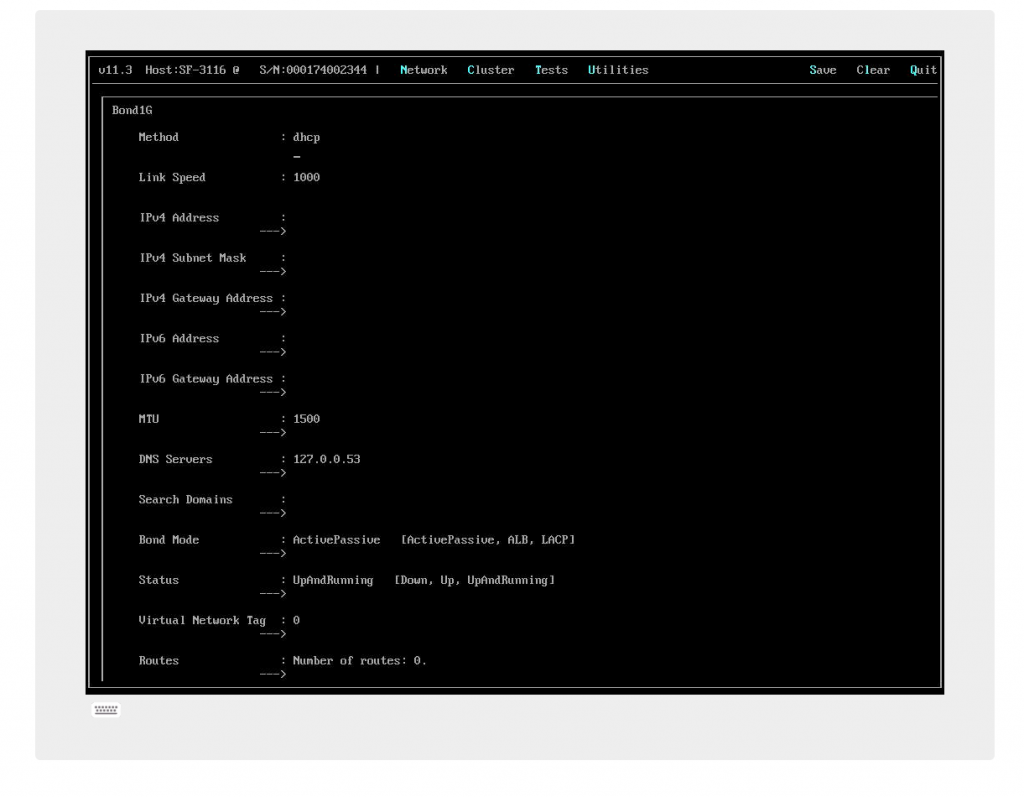
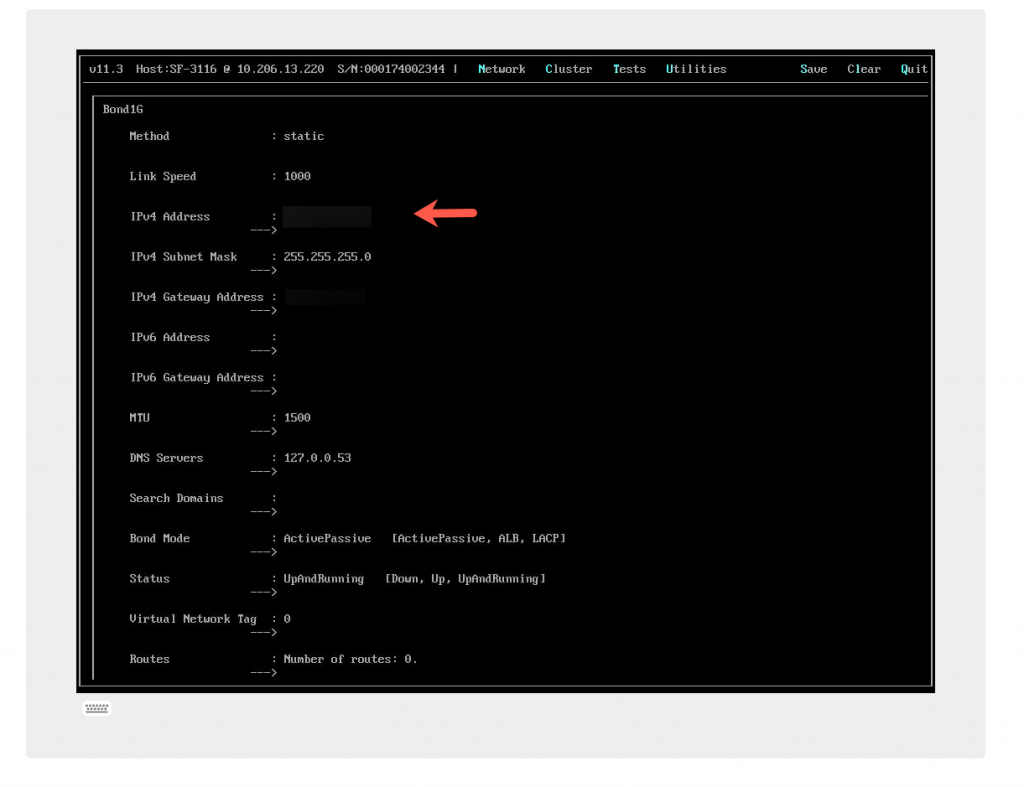
Set a single temporary IP address, subnet, and default gateway on the ‘Bond1G’ interface.
- Note: The temporary address only needs to be placed on one of the storage nodes.
- Use an available temporary network address on the same subnet as the remaining nodes.
- For example: IP – 10.10.10.100, Netmask – 255.255.255.0, Default Gateway – 10.10.10.1
- Tip: Use arrows to position the cursor on the desired input line and then hit return to enter ‘line edit’ mode. Enter the desired data and then hit enter to exit line edit mode.
Set the Bond mode to ‘LACP’ on the ‘Bond10G’ interface. Note that the Bond1G section is listed first. Use the arrow keys to scroll down to the Bond10G section.

Hit ‘S’ to save the configuration and ‘Y’ to confirm the save.
Repeat setting LACP on the 10GB Bonded interfaces on all remaining storage nodes.
You have successfully RTFI your Nodes and are ready for the NetApp Deployment Engine (NDE) of your Compute and Storage Nodes. In my next blog post, I will go through that process.
Awesome post! Keep up the great work! 🙂
Nice write up Allen, I had done something similar for internal training at my company. One thing worth noting, if you only wish to wipe the config and not do any upgrading, this is a quick way to do that on the storage nodes:
https://:442/json-rpc/8.2?method=StartRtfi&build=file:///sf/rtfi/image/filesystem.squashfs&sf_keep_network_config=0&sf_keep_hostname=0&sf_auto=1&sf_secure_erase=0
Must be done on all nodes in the SF cluster.
Thanks
please let me know if you have any questions? Thanks for stopping by.